How to Install Vinyl Flooring

Vinyl flooring is a popular choice for many homeowners due to its durability, easy maintenance, and wide range of styles. Installing vinyl flooring can be a straightforward DIY project, saving you money on professional installation costs. By following these simple steps, you can achieve a professional-looking finish in your home.
Preparation is Key
Before you begin the installation process, it is essential to prepare the room where you will be laying the vinyl flooring. Start by removing all furniture and appliances from the area. Clean the floor thoroughly to remove any dust, dirt, or debris that may affect the adhesion of the vinyl. If you are installing the flooring over existing tiles, ensure they are firmly in place and free of any cracks.
Acclimate the Flooring
Vinyl flooring needs time to acclimate to the room’s temperature and humidity levels to prevent buckling or warping after installation. Unbox the flooring and leave it in the room for at least 48 hours before starting the installation process. This will allow the material to expand or contract to match the room’s conditions.
Prepare the Subfloor
The next step is to prepare the subfloor for the vinyl installation. Ensure that the subfloor is clean, smooth, and level. Fill in any cracks or gaps with a floor patching compound and sand down any high spots to create a flat surface. It is crucial to have a smooth subfloor to prevent any imperfections from telegraphing through the vinyl flooring over time.
Lay Out the Flooring
Before you start laying the vinyl flooring, plan the layout to ensure a professional finish. Measure the room’s dimensions and use chalk lines to mark the center point. This will help you determine where to start installing the flooring and ensure an even layout across the room. Dry fit the vinyl planks or tiles to see how they will align and make any necessary adjustments before proceeding.
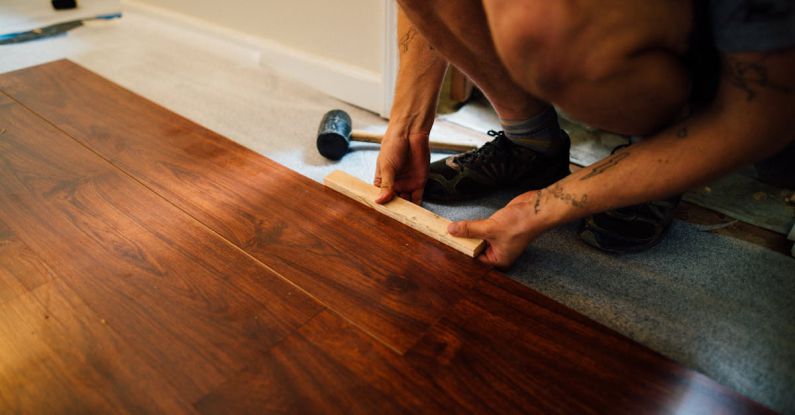
Install the Flooring
Begin the installation process by applying a thin layer of adhesive to the subfloor using a trowel. Work in small sections to ensure the adhesive does not dry before laying the vinyl flooring. Press the vinyl planks or tiles firmly into place, ensuring they are snug against each other to create a seamless finish. Use a roller to smooth out any air bubbles and secure the flooring to the adhesive.
Trim and Finish
Once the vinyl flooring is installed, trim any excess material around the edges of the room using a utility knife. Be sure to leave a small gap between the flooring and the walls to allow for expansion. Install quarter round molding or transition strips to cover the edges and create a clean, finished look. Finally, use a floor roller to go over the entire surface to ensure the vinyl is securely adhered to the subfloor.
Maintenance Tips
To keep your vinyl flooring looking its best, follow these maintenance tips:
– Regularly sweep or vacuum the floor to remove dirt and debris.
– Clean up spills immediately to prevent staining.
– Use a damp mop with a mild detergent to clean the floor regularly.
– Avoid using harsh chemicals or abrasive cleaners that can damage the vinyl.
In conclusion,
Installing vinyl flooring is a budget-friendly way to update the look of your home while enjoying the benefits of a durable and easy-to-maintain floor covering. By following these simple steps and taking the time to properly prepare and install the flooring, you can achieve a professional finish that will last for years to come.